Wattle Stitch - photo tutorial for beginners
Wattle stitch is officially my number one crochet stitch! I can't remember how I found out about it, but it was definitely love at first sight :) As it was one of the first stitches I have learnt, I was really surprised to discover that a lot of experienced crocheters have never heard of it...
I believe that such a beautiful stitch deserves more attention and I recommend it to every crochet enthusiast, especially to a beginner. Wattle stitch is super easy to learn and memorize. If you know how to crochet a chain, single crochet and double crochet stitches, you can make it too. I have prepared some basic information, together with a detailed photo tutorial, so that everyone can easily master this amazing crochet stitch.
Why to choose wattle stitch?
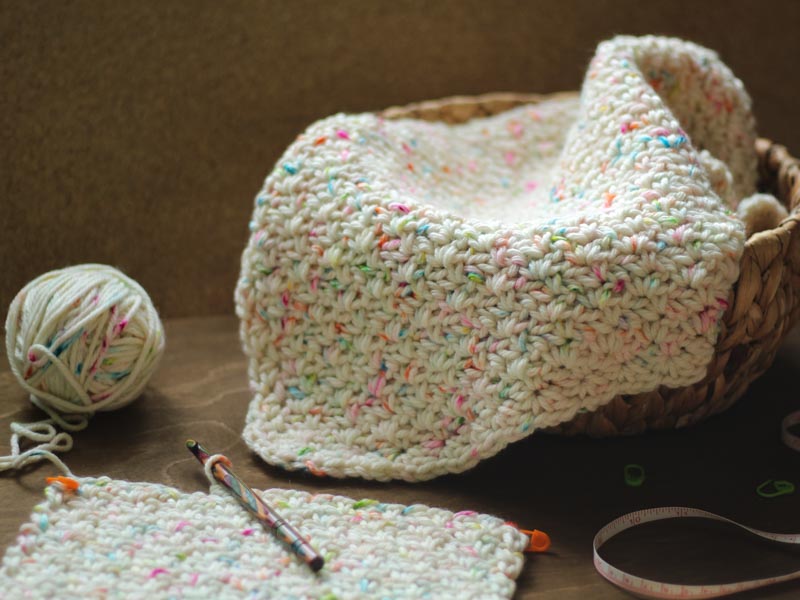
There are numerous reasons why I love wattle stitch so much, but it's mainly because of the texture. This stitch creates quite dense and reversible fabric, with a nice drape. And I really like this pretty and modern look (check this beautiful and delicate blanket below). The other thing worth mentioning is how quickly it grows. Once you get the hang of it, and complete your foundation row, the project will fly off you hook. Besides, patterns based on wattle stitch make perfect projects to work on, while watching movies or relaxing. There is no need to count stitches or refer to the pattern... But be careful here, that's how you get addicted to crochet :) And last but not least, wattle stitch can be used for many different projects. I love it especially for baby blankets, but I've also made some nice rugs, placemats and even hats. You can try it as well for dishcloths, cushions, shawls, cowls and many more.
How to crochet wattle stitch?
Wattle stitch is an example of a paired stitch, where a single crochet (sc) and a double crochet (dc) are linked by a chain (ch) (US terms). The pattern starts with a foundation chain in multiples of 3. And the first group of stitches is worked into the 3rd chain from the hook. So, it goes like this; *(1 sc, ch 1, 1 dc), skip two chains* and repeat between ** until you have 3 chains left. Skip 2 chains and work sc into the last one. That's row 1 done. After setting up the foundation, each row is then started with ch 1, and each group is worked into the chain space from the previous row. To finish row, simply make sc into the turning chain.
I told you it was easy :) For visual learners I have made some nice photos matching the above description.
And here are just few important things to remember:
WATTLE STITCH - BEGINNERS GUIDE
- Beautiful textured and reversible crochet stitch
- One-row repeat pattern
- Each group is made of 1 sc , ch 1, 1 dc (US terms) worked into the same chain/chain space
- Start your project with a chain in multiples of 3
- Start each row (except row 1) with a ch 1
- Finish each row with sc worked into the turning chain
- Keep your last sc and ch 1 relatively loose (helps with the straight edges)
- At the end of the row double check that you have the correct number of groups of stitches
- At the end of the row make sure that you don't miss working into the turning chain
STITCH SWATCH
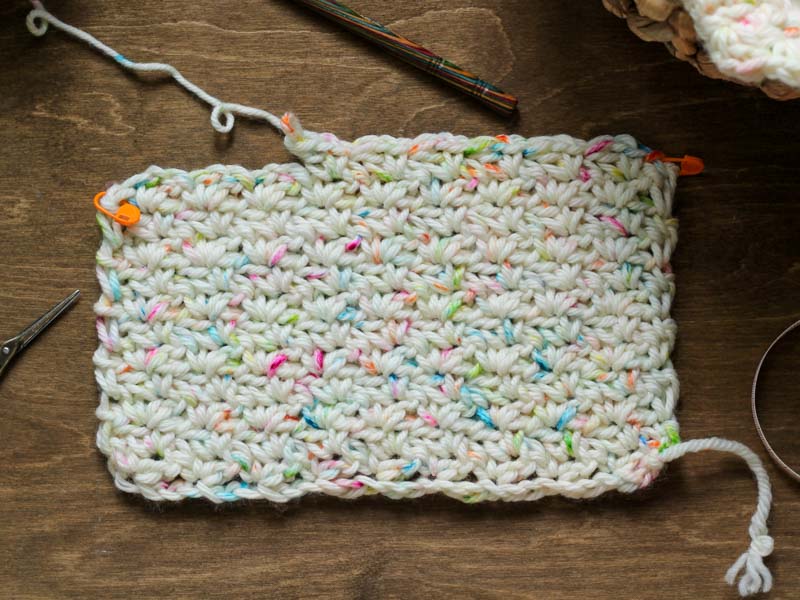
Let’s get to the point. Grab your favorite yarn and a corresponding crochet hook and join me in making a practice swatch. By doing this small sample you can easily learn how to crochet wattle stitch and find out by yourself how gorgeous this stitch is. You are going to need 2 stitch markers as well.
I am using a beautiful hand dyed merino wool from Sandnes Garn and a 9 mm crochet hook. This super soft and chunky wool is called Konfetti (unfortunately it is no longer available).
Abbreviations (US terms):
ch – chain
sc – single crochet
dc - double crochet
sl st – slip stitch
FOUNDATION CHAIN
1. Chain 30
2. Place your stitch marker in the last chain.
ROW 1
INFO: In this tutorial row 1 is done by working into the back bumps of the foundation chain, but you can also do it traditional way.
3. Start working in the 3rd chain from the hook (skipped chains count as 1st sc). Make 1 sc, ch 1, 1 dc, all into same chain.
4. Skip 2 chains and work into 3rd one. Make another group of 1 sc, ch 1, 1 dc.
5. Repeat step 4 until you have 3 chains left.
TIP
Have you ever tried crocheting into back bumps of the foundation chain? That is how I start most of my projects. I do it mainly to have a nice and neat bottom edge, that matches the top edge of my project. But this method also adds some strength to the bottom of my work.
TIP
At the beginning it is a good idea to count the total number of groups of stitches at the end of the row.
6. Double check that you have done 9 groups of stitches.
7. To finish this row, skip 2 chains and work sc into the last one.
ROW 2
8. Turn your work and chain 1 (counts as 1 sc).
9. Place you second stitch marker in the turning chain.
10. Find the first group of stitches from the row below and make 1 sc, ch 1, 1 dc into the chain space (marked by a big red arrow).
TIP
Working into the turning chain may be challenging, but it is really important for neat and straight edges. That's why I always mark my turning chains with the stitch markers. It saves me from wondering where to put another stitch.
11. Find another group of stitches from previous row, and work 1 sc, ch 1, 1 dc into the chain space.
12. Repeat step 11 until the end of the row.
TIP
It may be a bit tricky to find the chain space at the beginning, but it gets better with time. If it happens to you, try using some additional stitch markers, or maybe switch for a bulky yarn and a large crochet hook. It is much easier to learn how to crochet with some chunky yarn.
13. Just to be on the safe side double check that you have done 9 groups of stitches.
14. Complete this row with a sc worked into the turning chain (marked by your first stitch marker).
TIP
When working your last sc of the row, keep it loose and try to match its height to the height of the row. Same with the turning chain. It will reduce tension at vertical edges and make them nice and stretchy.
CONSECUTIVE ROWS
15. Keep on repeating row 2 until you are happy with your progress, or until you reach your desired length.
16. Join with sl st into the turning chain, finish off and weave in all ends.
Your practice swatch is ready!
And that's how it goes... What do you think? Do you like it?
Thank you for stopping by :) I hope I have managed to convince you to try wattle stitch in your next project. If you find this tutorial helpful and worth recommending, please share it with your fellow crocheters. Such a beautiful stitch deserves to be well known :)
I'd love to see your stitch samples, or finished pieces crocheted with this tutorial. Please post them in the comment section below or share on your Social Media and tag @ Many Evenings Crochet (#manyeveningscrochet). Feel free to contact me in case of any questions.
Hope to see you soon :)
Check my wattle stitch crochet patterns
manyevenings@gmail.com
(+48) 513 637 578
Many Evenings s.c.


